
Features:
- · Serial communication using I2C protocol
- · Wide range of input AC Voltage 90-264 Volt AC
- · Optically isolated control signal
- · Safety fuse for overcurrent protection
- · Programmable I2C address
- · Phase control instead of simple ON/OFF
- · 7-bits addressing mode
- · i2c data transfer speed upto 100kbps
Descriptions:
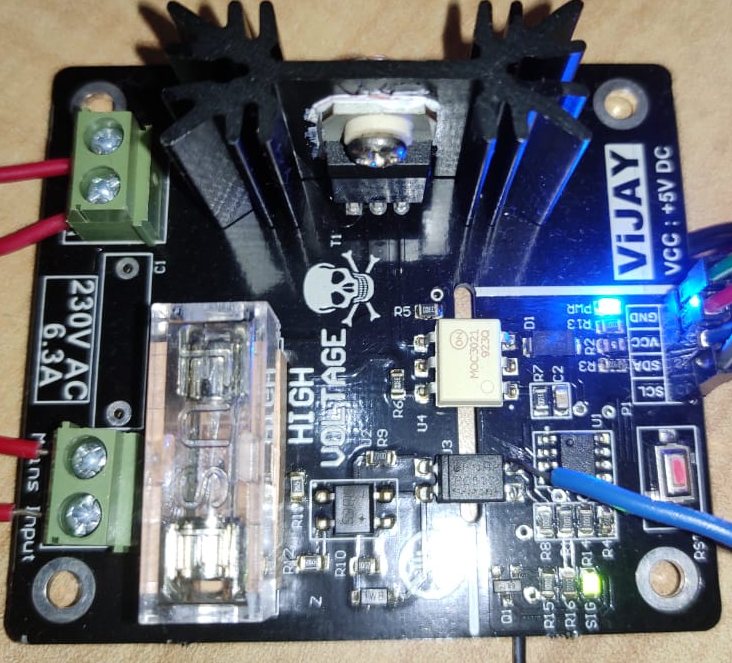
TRIACON1 is a single-port AC switch module that utilizes TRIAC technology. This module can be controlled via a standard I2C interface. It features a programmable address, allowing customization to meet specific requirements.
Hardware developers will find it convenient for prototype designs where phase control is necessary. Additionally, the module interfaces seamlessly with popular platforms such as Arduino, Raspberry Pi, Banana Pi, Orange Pi, and other SBCs and microcontrollers.
Application:
- · Dimmable AC lights
- · Heater
- · Small AC Motor
- · AC Switching and Power Control
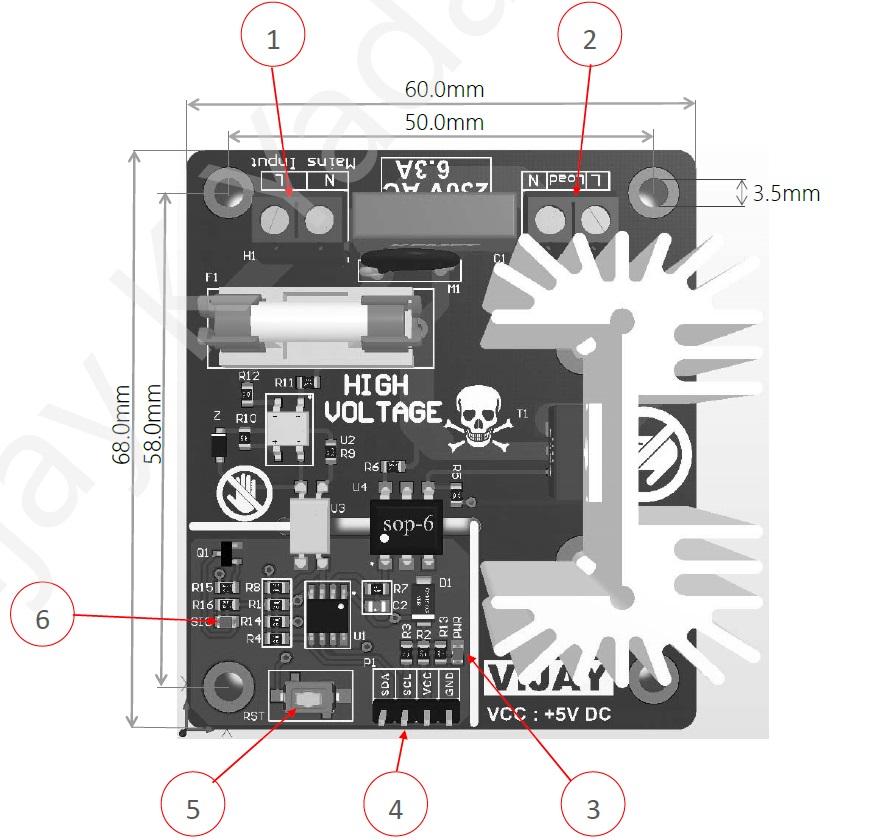
| 1 | AC input terminal |
| 2 | Load Terminal |
| 3 | Power LED |
| 4 | i2c Header connector (4 Pin, 2.54mm pitch) |
| 5 | Address Reset Switch |
| 6 | Data transmission LED |
Absolute Maximum ratings:
| Input AC Voltage | 275 | V |
| Output AC Current | 6 | A |
| VCC | 5 | VDC |
Default I2C address:
| Default i2c address | 0x18 h |
Commands:
| Command Descriptions | Code (Hex) |
| Device address change | 0x1E |
| Data write | 0x01 |
| Data read | 0x0B |
Write Byte sequence:
| First Byte – Address | Second Byte – command | Third Byte – Data |
Read Byte sequence:
| First Byte – Address | Second Byte – command |
Reset Default Address:
- Turn off the device.
- Press and hold the reset switch
- Turn on the device
- Release the reset switch.
If the signal LED has blinked 4-5 times then module address has been reset to its default address i.e. 0x18h.
Custom Address:
The module address is customizable, and here’s an example of how to change it. If the module’s current address is its default address (0x18h), and the user wants to change it to 0x28h, follow this code sequence:
0x18h -> 0x1Eh -> 0x28h
If the signal LED has blinked 4-5 times, it indicates that the module address has been reset to its default address, which is 0x18h.
Working principle:
The device controls the phase firing of the input AC supply. During each half-cycle (which is 180 degrees), it is divided by a fraction of 100.
If the user sends the data as 100, the TRIAC will be turned on for the entire half cycle in both directions, and 100 percent input power will be transferred to the load. If the user sends the data as 50, the TRIAC will be turned on for only a 90-degree range in both directions. If the user sends the data as 0, the TRIAC will be turned off in both directions. The user can control the power delivered to the load by setting the control data anywhere from 0 to 100.
Arduino Wire.h library:
Arduino master Tx shifts the address 1-bit left before the start of transmission. It should be made a note while using Arduino Wire.h library. The user should use the address 0x0Ch in the Arduino IDE to communicate with the module with the default address i.e. 0x18h.
Arduino Code:
// I2C SSR Switch by Vijay K Yadav
// Code uses Wire.h library by Nicholas Zambetti
// Created 29 August 2020


#include <Wire.h>
unsigned char data_received=0;
void setup() {
  Wire.begin();        // join i2c bus
  Serial.begin(9600);  // start serial for output
  while (! Serial);
  //write_data(0x0C,0x1E,0x18);//(current address, address change command, new address)
}
void loop() {
  write_data(0x0C,0x01,40);//(address, command, data)
  read_data(0x0C,0x0B);//(address, command)
  delay(10);
}

void read_data(uint8_t device_addr, uint8_t command)
{
  Wire.beginTransmission(device_addr); // transmit to device #0x0C
  Wire.write(command);// sends one byte
  Wire.endTransmission();// stop transmitting
  delay(100);
  Wire.requestFrom((uint8_t)device_addr, 1);    // request 6 bytes from slave device #0x0C
  while (Wire.available()) { // slave may send less than requested
    data_received = Wire.read(); // receive a byte
  Serial.print("Switch On Time = ");         // print the character
  Serial.print(data_received);         // print the character
  Serial.println("%");         // print the receive value
  }  delay(100);
}

void write_data(uint8_t device_addr, uint8_t command, uint8_t data) {
  Wire.beginTransmission(device_addr); // transmit to device #0x0C
  Wire.write(command);// sends one byte command
  Wire.write(data);// sends one byte data
  Wire.endTransmission();// stop transmitting
  delay(100);
}
//end of the code