
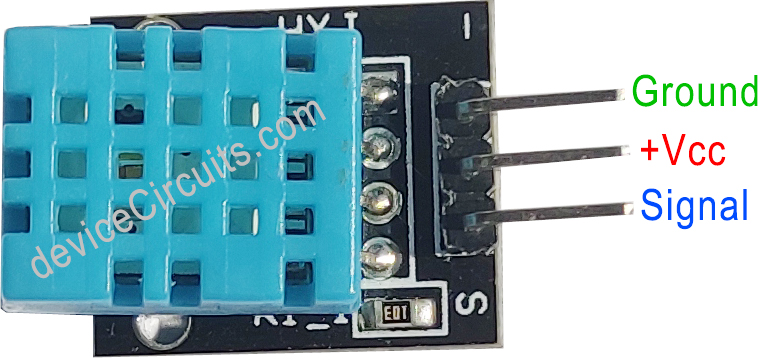
Fig. 1
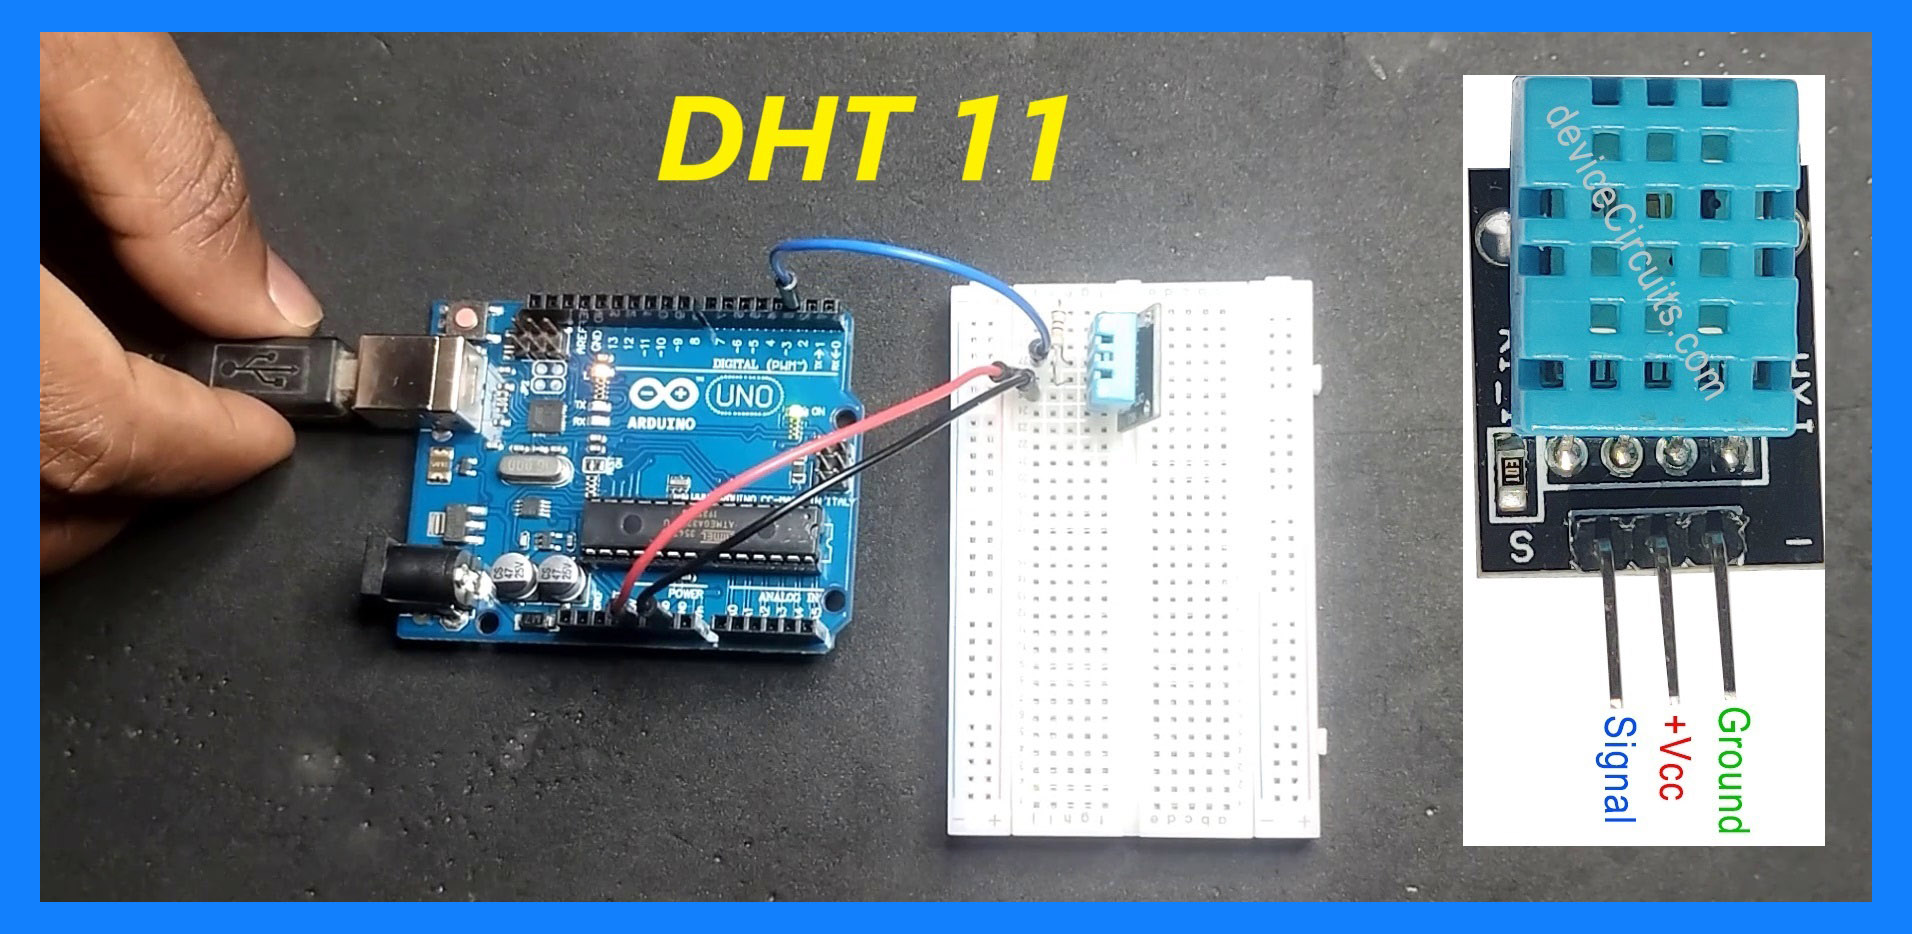
The DHT11 sensor is a low-cost digital temperature and humidity sensor. It consists of a capacitive humidity sensor and a thermistor for measuring temperature, along with an analog-to-digital converter and a signal processing unit. The sensor provides digital output for both temperature and humidity, making it easy to interface with microcontrollers or single-board computers like Arduino or Raspberry Pi. It’s commonly used in various projects and applications such as weather stations, environmental monitoring systems, and home automation. In this tutorial, we shall interface this module with the Arduino Uno board. Image of the DHT11 Sensor module is depicted in Fig.1
Connection Diagram with Arduino
In the DHT11 module, an inbuilt controller provides a serial data transfer facility. A 4k7 pull-up resistor is used between +Vcc and Signal. The connection diagram is shown in Fig. 2
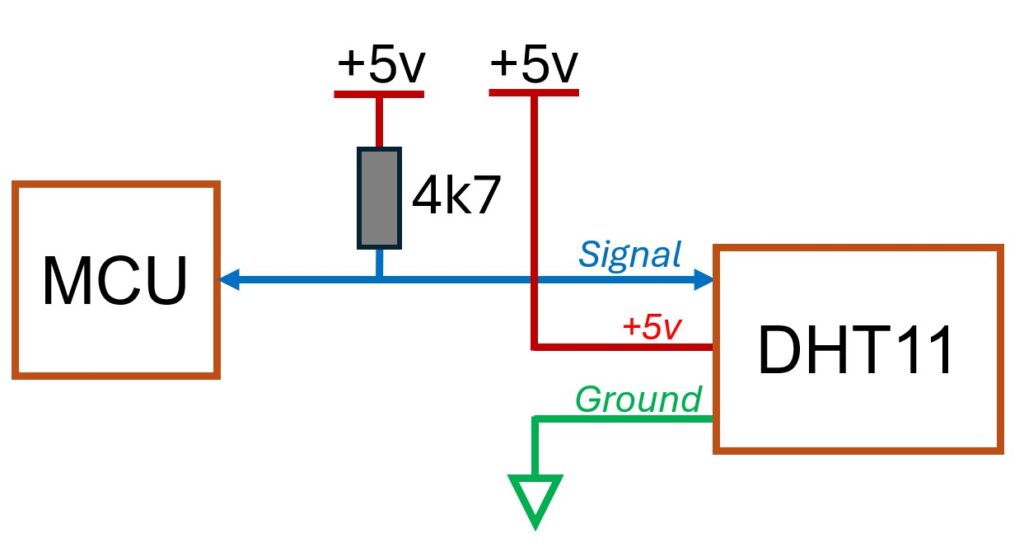
Fig.2
Arduino Code
#include <dht11.h>
#define DHT11PIN 2 // assign the pin for signal

dht11 DHT11;

void  setup()
{
  Serial.begin(9600);
}

void loop()
{

  int temp = DHT11.read(DHT11PIN); // read the data from module

  Serial.print("Humidity (%): ");
  Serial.println((float)DHT11.humidity, 2); // print the humidity data

  Serial.print("Temperature  (C): ");
  Serial.println((float)DHT11.temperature, 2); // print the temperature data

  delay(1000); // delay for 1 second
}